[Spring Boot] 개발환경 설정 -(3) Swagger 적용하기 & Lombok 적용
1. swagger
RestAPI로 데이터를 전달받을 계획이다.
안드로이드와 IOS 개발자가 결과물을 미리 테스트해서 볼 수 있도록 하기위해서 Swagger를 쓰려고 한다.
Postman도 편리하긴 하지만 url을 일일이 입력해야 하는 불편함이 있고 다운받아야 해서 번거로운 것 같다.
회사에서 Swagger를 써보니 아주 편리하더라..
Swagger는 API 목록을 웹에서 확인 및 테스트할 수 있게 도와주는 Library이다.
Controller에 정의된 모든 URL을 확인할 뿐만 아니라
목록, 명세 및 설명, 테스트까지 가능하다.
출처: https://data-make.tistory.com/550 [Data Makes Our Future:티스토리]
2. Lombok
Lombok은 프로젝트 생성할 떄 dependency 선택을 분명히 했는데 .get~~ 하면 자동으로 getter가 보여야하는데 안보였다.
찾아보니 설치를 또 해줘야 하는것이다...
Gradle 설정
implementation 'io.springfox:springfox-boot-starter:3.0.0'
implementation 'io.springfox:springfox-swagger-ui:3.0.0'
Swagger Config 생성
@Configuration
@EnableWebMvc
public class SwaggerConfig {

    private ApiInfo swaggerInfo() {
        return new ApiInfoBuilder().title("IoT API")
                .description("IoT API Docs").build();
    }

    @Bean
    public Docket swaggerApi() {
        return new Docket(DocumentationType.SWAGGER_2)
                .consumes(getConsumeContentTypes())
                .produces(getProduceContentTypes())
                .apiInfo(swaggerInfo()).select()
                .apis(RequestHandlerSelectors.basePackage("com.pigplace"))
                .paths(PathSelectors.ant("/api/**"))
                .build()
                .useDefaultResponseMessages(false);
    }

    private Set<String> getConsumeContentTypes() {
        Set<String> consumes = new HashSet<>();
        consumes.add("application/json;charset=UTF-8");
        consumes.add("application/x-www-form-urlencoded");
        return consumes;
    }

    private Set<String> getProduceContentTypes() {
        Set<String> produces = new HashSet<>();
        produces.add("application/json;charset=UTF-8");
        return produces;
    }
}
- .apis(RequestHandlerSelectors.basePackage("패키지명")
- PathSelecors.ant("/api/**"))
: 이건 /api로 시작하는 url만 적용하겠다는 뜻
샘플 컨트롤러
RestTestController
@RestController
@RequestMapping("/api")
public class RestTestController {

	@ApiOperation(value="Test 서비스", notes="이 API에 대한 설명입니다.")
	@ApiResponses({
	        @ApiResponse(code = 200, message = "API 정상 작동"),
	        @ApiResponse(code = 500, message = "서버 에러")
	})
	@PostMapping("/swaggerTest")
	public ResponseApiEntity swaggerTest(@RequestBody TestVO testVO) throws Exception {
		ResponseApiEntity response = new ResponseApiEntity();
		response.add("test", testVO);


		System.out.println("testVO" + testVO.toString());
		System.out.println("response" + response.toString());
	    return response;
	}

}
TestVO
@Schema(description = "테스트VO")
@Data
public class TestVO {
	@Schema(description = "아이디", nullable = false, example="아이디example")
    String id;
	@Schema(description = "비밀번호", nullable = false, example="패스워드example")
    String pw;
}
ResponseApiEntity
@Data
public class ResponseApiEntity{

	@ApiModelProperty(example = "상태코드")
	private int status;

	@ApiModelProperty(example = "메세지")
	private String message;

	@ApiModelProperty(example = "응답데이터")
	private Map<String, Object> data;

	@ApiModelProperty(example = "시간")
	private LocalDateTime timestamp;

	public ResponseApiEntity() {
		this(HttpStatus.OK);
	}

	public ResponseApiEntity(HttpStatus httpStatus) {
		this.status = httpStatus.value();
		this.message = httpStatus.getReasonPhrase();
		this.data = new HashMap<>();
		this.timestamp = LocalDateTime.now();
	}

	public void add(String key, Object value) {
		this.data.put(key, value);
	}

}
swagger 확인 방법은
localhost:8080/swagger-ui/index.html로 접속 하면 된다.
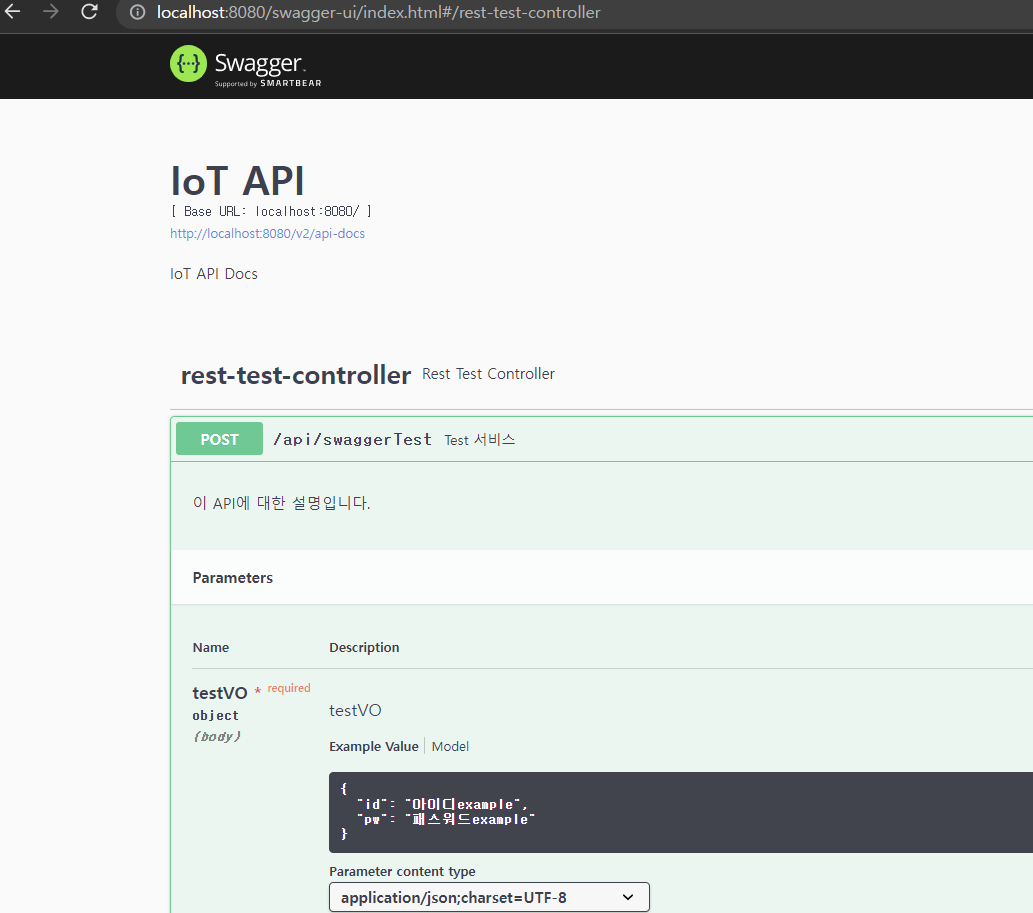
접속하면 위와 같이 뜨고
오른쪽에 try it out을 누른다.
필요한 값을 json형태로 입력해주고(@RequestBody 어노테이션 때문에 Json 형태로 입력해야 한다.)
excute을 누르면
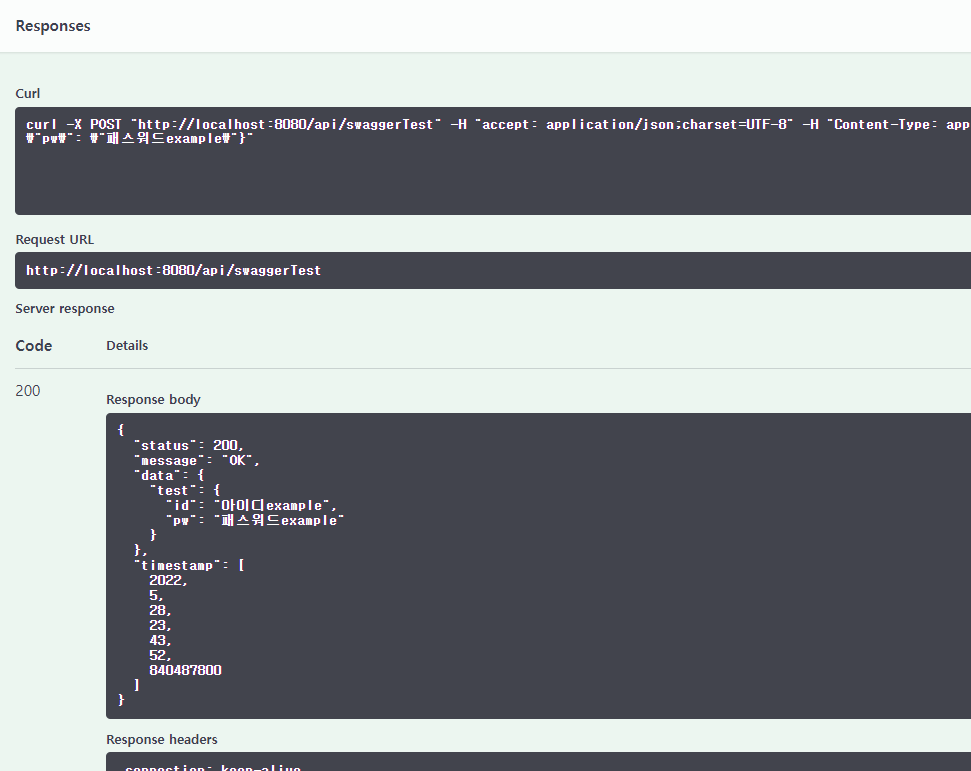
이렇게 뜨는걸 볼 수 있다.
Lombok 적용하기
https://projectlombok.org/download
Download
projectlombok.org
위 사이트 들어가서 다운로드 후 실행하면
알아서 STS 경로를 찾는다.
설치하면 끝!!
STS 켜진상태에서 설치하면 바로 적용이 안된다.
STS 껐다 켜준 후 다시 .get~~을 해주자.